






You open the Chrome Web Store, install the Chromebook recovery tool, and somewhere in the fine print it says this will erase your hard drive. That’s not a bug. That’s the whole point. The Chromebook Recovery Utility reinstalls ChromeOS from scratch, which means it wipes everything local: downloaded files, installed apps, saved settings, all of it.
This guide covers what the Chromebook recovery tool actually does, how it differs from a Powerwash or a plain restart, and when to reach for each one. We’ll walk through what to back up first, what happens on school or work devices, and what to do once the process finishes. We’ll also flag a detail most guides skip: BelayTab’s optional rolling backup file lives in your Downloads folder, so a Recovery or Powerwash takes it down with everything else, and we’ll show you how to avoid that.
What Is the Chromebook Recovery Utility?
The Chromebook Recovery Utility is a Chrome extension that builds bootable recovery media so you can reinstall ChromeOS when the operating system won’t start or has become corrupted. Google distributes it through the Chrome Web Store, and it runs entirely inside Chrome — no separate installer, no disc, nothing to download outside the browser. Plug in a USB drive, pick your Chromebook’s model, and the extension writes a fresh copy of ChromeOS onto that drive so the device can boot from it and reinstall itself.
Some people call it a chromebook restore utility, since restoring ChromeOS to a working state is exactly what it does. It isn’t a cleanup step and it isn’t the ChromeOS equivalent of clearing your cache or freeing up storage. It’s a last resort for a device that’s genuinely stuck — a black screen, a boot loop, or an operating system that a Powerwash alone can’t fix. If your Chromebook boots fine and just feels cluttered or slow, this tool almost certainly isn’t the answer; a restart or a look at what’s eating your resources will get you further, faster.
Because the extension is built and maintained by Google rather than a third party, it’s also the only recovery path Google documents and supports. There’s no separate “professional” version and no paid tier. It’s free, and it works the same way regardless of which Chromebook manufacturer made your device, as long as you pick the correct model during setup. Picking the wrong model is the most common way people end up with recovery media that won’t work, so slow down at that step.
Google’s own reset help page walks through the extension step by step and is worth bookmarking before you start, since it’s also where you’ll confirm your exact model’s recovery key combo and any model-specific notes that don’t fit neatly into a general guide like this one.
Recovery vs Powerwash vs Restart vs Hard Reset: Quick Answer
Restart first, hard reset second, Powerwash third, and Recovery only when ChromeOS won’t boot at all. That’s the order Google recommends for troubleshooting a Chromebook.
| Situation | Best fix | What it erases |
|---|---|---|
| App or tab frozen | Restart | Nothing |
| Chromebook unresponsive to clicks | Hard reset (last resort) | Nothing |
| Slow, cluttered, want a clean start | Powerwash (chromebook factory reset) | Local data: Downloads, apps, settings |
| ChromeOS won’t boot or is corrupted | Recovery | Entire hard drive |
A restart is free in every sense. It never deletes anything, so it’s always worth trying first for a stuck app or a browser that’s acting strange. It takes thirty seconds and costs you nothing if it doesn’t work, which is more than you can say for the other three options on this list.
A hard reset (hold Refresh and tap Power, releasing Refresh once it starts up) is also non-destructive, but Google specifically calls it a last resort for after other troubleshooting has failed, not a first move. It’s meant for a device that’s stopped responding to the keyboard or trackpad entirely, not one that’s merely slow.
Powerwash and Recovery are the two that erase something, and people mix them up constantly. If you search powerwash chromebook, you’ll usually land on Google’s help page confirming it wipes local data and settings but leaves your account and Drive files alone. Recovery goes further and erases the whole drive, reinstalling the operating system in the process. It’s the option of last resort, not a routine maintenance step. See our full guide to Chromebook reset options if you want the complete decision tree with more troubleshooting steps at each stage.
How Do You Create Chromebook Recovery Media?
You create Chromebook recovery media using the Recovery Utility extension and a spare USB drive, in five steps.
- Install the extension. Get the Chromebook Recovery Utility from the Chrome Web Store, on a computer other than the one you’re recovering.
- Open it and click Get Started.
- Pick your manufacturer and model. Check the bottom of the Chromebook or Settings > About ChromeOS if you’re unsure of the exact name.
- Insert a USB drive and select it. Anything already on the drive will be erased.
- Click Create now. The extension formats the drive and writes the recovery image to it.
Buy a bigger drive than you think you need. Google doesn’t publish an exact minimum size for recovery media, so when you’re unsure, a larger USB drive is the safer bet over a small one you’re not confident will fit the image.
You obviously can’t build recovery media on a Chromebook that won’t boot, so you’ll need a second device — another Chromebook, a Windows PC, or a Mac, as long as it can run Chrome and install the extension. This is worth planning for before you need it: if your only Chromebook is the one that’s broken, you’ll be borrowing a laptop or heading to a library at the worst possible time.
Once the media is built, don’t assume you’re done with it after one use. The same USB drive can be reused for future recoveries of the same model, so label it clearly with the model name and date before you put it in a drawer. A drive marked “Chromebook recovery, 2026” saves you from redoing this whole process from memory the next time something goes wrong, possibly years from now when the exact steps have faded.
How Do You Boot Into Recovery Mode?
You boot into Chromebook recovery mode by holding Esc + Refresh, then pressing and releasing Power — some models use Esc + Maximize + Power instead. This brings up the “ChromeOS is missing or damaged” screen, where you insert the USB drive you built earlier and let the device reinstall automatically.
Chromebook recovery mode looks the same on every affected model: a bare screen with a folder-and-exclamation icon and on-screen instructions to insert your recovery USB. You don’t always have to trigger it yourself, either — sometimes it appears on its own, without any key combo, when ChromeOS detects real corruption at boot and can’t start normally.
Recovery erases everything. Once recovery starts, there’s no pausing to grab a forgotten file. If anything on the local drive isn’t backed up, back it up before you press Power, not after. There’s no undo once the process begins.
Once the recovery screen detects your USB drive, don’t remove it and don’t power the device off mid-process. Interrupting recovery partway through can leave the Chromebook in a worse state than when you started — sometimes requiring you to redo the entire process from the very beginning, USB and all. Let it run uninterrupted until the device tells you it’s finished and prompts a restart.
If neither key combo brings up the recovery screen at all, you’re probably using the wrong one for your specific model. Manufacturers vary here, and there’s no universal combo that works across every Chromebook ever made. Check your device’s official support page for the exact keys before assuming the tool itself is broken. It usually isn’t.
What Does the Recovery Tool Actually Erase?
The Chromebook recovery tool erases everything on the local hard drive, including downloaded files, and it’s more destructive than a Powerwash.
| Data | Powerwash | Recovery |
|---|---|---|
| Downloads folder | Erased | Erased |
| Installed apps / local settings | Erased | Erased |
| The OS itself | Stays installed | Erased and reinstalled |
| Google Drive files | Untouched | Untouched |
| Google Account data | Untouched | Untouched |
| External/USB storage | Untouched | Untouched |
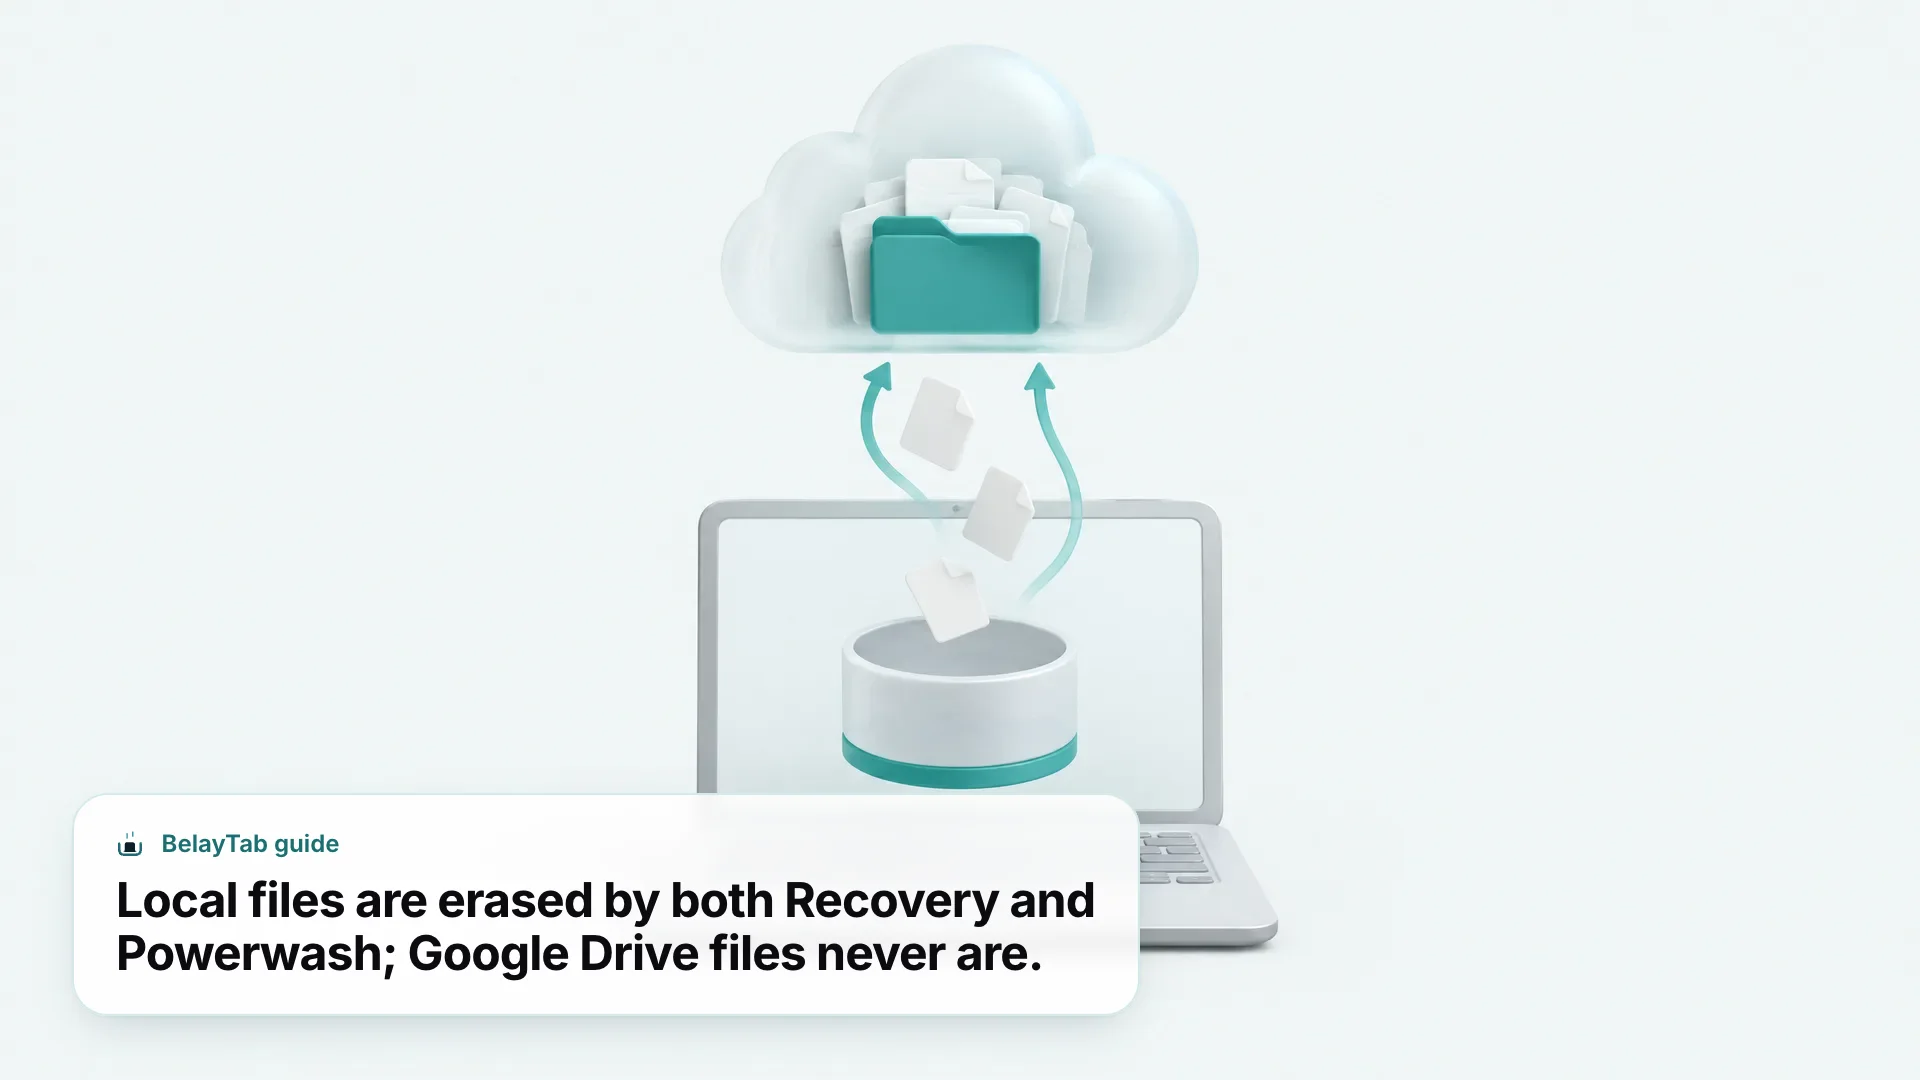
Powerwash clears local user data and settings and returns the device to its factory state, but it doesn’t touch the operating system itself — ChromeOS stays installed and intact throughout. Recovery erases the entire drive and puts a fresh copy of ChromeOS back on it, which is why Google reserves it for cases where the operating system itself is the actual problem, not just the account or the local settings sitting on top of it.
Neither process touches Google Drive or your Google Account, for the same reason in both cases: neither one is stored on the device. Everything account-related (your synced bookmarks, saved passwords, and Drive files) lives on Google’s servers and simply reattaches itself the next time you sign back in. What’s genuinely at risk is anything that only ever existed locally: files saved straight to the Downloads folder, offline documents you were editing without a connection, and any app data that was never backed up anywhere else.
That last category is exactly where BelayTab users need to pay attention, since its free tier keeps an optional rolling backup file inside that same Downloads folder. We’ll cover what to do about that specifically in a moment, but first, a broader look at everything worth backing up before you start either process.
What Should You Back Up Before Running Recovery or Powerwash?
Back up anything that only exists locally on the Chromebook (files in Downloads, offline documents, and any browser export files) before you start either process. Everything stored in Google Drive or on external storage is already safe, so it doesn’t need a separate backup for this specific reset.
Start with the obvious folder: Downloads. This is where most locally saved files end up by default, whether that’s a PDF you downloaded for offline reading, a spreadsheet a colleague emailed you, or an installer file you never got around to deleting. Open the Files app, sort by the Downloads folder, and skim through it before you reset anything. It’s easy to forget what’s piled up there over months of use.
Next, think about anything you deliberately kept offline. If you use Google Docs, Sheets, or Slides in offline mode, those files sync back to Drive automatically as long as you had a connection recently, but it’s worth confirming that sync completed before you wipe the device. The same goes for any offline media, downloaded maps, or files you copied over specifically because you knew you’d be without internet.
Finally, don’t forget browser-level exports. Any tool that writes backup files to Downloads (bookmark exports, session exports, or a BelayTab export file) needs the same treatment as everything else in that folder. Copy it into Drive, or set up cloud-based sync so it never has to live locally in the first place. We’ll cover BelayTab specifically next, since it’s the one piece of this puzzle most people overlook until it’s too late.
What Happens to Your Downloads Folder and BelayTab’s Backup File?
Powerwash and Recovery both erase your Downloads folder completely, and that includes BelayTab’s rolling export file if you’ve turned that feature on.
BelayTab is a browser extension that saves your open tabs as named sessions so a crash, a closed window, or a reset doesn’t cost you your work. Its free tier already protects you automatically, with snapshots on a five-minute timer and again when a window closes, the last 20 versions of every session kept as history, and a 30-day trash for anything you delete by mistake. All of that lives in the extension’s own storage, completely separate from the Downloads folder, so a Powerwash or Recovery doesn’t touch it directly at all.
The one feature that does live in Downloads is the optional rolling export: a JSON file BelayTab can write there on a schedule you turn on, as an extra portable backup of your sessions. It’s a genuinely useful layer, right up until you wipe the device it happens to be sitting on. Since Powerwash and Recovery both erase the Downloads folder along with everything else local, that export file goes with it, exactly the same as any other file you’d saved there yourself and forgotten about.
The fix isn’t complicated, but it does require a habit. Don’t leave that file as the only copy of your sessions. Move it to Google Drive on a regular basis, or skip the manual step entirely and use BelayTab Sync so your sessions live in the cloud instead of a local folder that a reset can reach.
How Do You Protect Your Tabs Before Running Recovery or Powerwash?
You protect your tabs by making sure your BelayTab sessions exist somewhere other than the local Downloads folder — either Google Drive or BelayTab Sync.
- Find your export file. Check your auto-export settings to see where and how often it’s being written to Downloads.
- Copy it into Google Drive. Drag the file into a Drive folder before you Powerwash or run Recovery — Drive files survive both.
- Or export manually right before a reset. Use export your sessions to save a fresh JSON, CSV, URL list, or HTML bookmarks file, then upload it to Drive.
- Confirm it’s there. Open Drive from another device or browser and check the file opened correctly before you wipe anything.
Moving one file to Drive before a reset takes under a minute, and it’s about the cheapest insurance you’ll set up all day. It works, and there’s nothing wrong with doing it manually every time you know a Powerwash or Recovery is coming.
Where it falls short is the reset you didn’t plan for — the one triggered by a device that suddenly won’t boot, with no warning and no chance to copy a file beforehand. If you reset a Chromebook once and then forget about the whole topic for years, Sync is the more durable option precisely because it removes the local file from the equation entirely. There’s nothing sitting in Downloads to remember to move next time, because there’s no local copy to begin with.
Can IT Admins Block Powerwash or Recovery on School and Work Chromebooks?
Yes — on managed school or work Chromebooks, IT admins can disable Powerwash entirely through a device policy, and users on those devices need to contact their admin instead of troubleshooting it themselves.
If you try to Powerwash a managed device and the option is greyed out, missing, or simply doesn’t trigger anything, that’s almost certainly by design rather than a bug. Schools and companies that manage fleets of Chromebooks often lock down destructive actions like Powerwash to prevent students or employees from wiping devices that carry enterprise configuration, monitoring software, or restricted app installs. If you hit this wall, your IT department or school’s tech admin is the right next step, not another round of key-combo troubleshooting.
There’s also a difference worth knowing about on the data-erasure side. On enterprise and school devices, Powerwash performs a cryptographic erase in addition to the normal local wipe. It clears the device’s encryption keys, which makes any remaining data effectively unreadable even if some traces technically remain on the storage chip. Google doesn’t claim every trace is guaranteed removed, but this extra step is specifically why organizations lean on Powerwash (rather than, say, simply removing a user account) when a managed device changes hands or needs a genuine clean slate.
None of this changes how Recovery behaves — the recovery tool itself doesn’t have a separate “managed” mode described in Google’s documentation. What changes on managed devices is mainly around Powerwash: whether it’s available to you at all, and what happens under the hood when it runs. If you’re on a personal, unmanaged Chromebook, none of this applies, and both Powerwash and Recovery work exactly as described earlier in this guide.
When Should You Choose Recovery, Powerwash, or Just a Hard Reset?
Match the fix to the symptom: a hard reset for an unresponsive device, Powerwash for a fresh start on a device that still boots, and Recovery only when ChromeOS itself won’t load.
- Hard reset. For a frozen Chromebook that won’t respond to clicks or the keyboard. Hold Refresh and tap Power, releasing Refresh once it restarts — erases nothing.
- Powerwash. For a device that boots fine but is slow, cluttered, or changing owners. Erases local data and settings, leaves Drive and your account untouched.
- Recovery. For a Chromebook that won’t boot, or where ChromeOS seems corrupted. Erases the entire drive and reinstalls the OS — the most destructive option, and the last one to try.
Most people reach for Powerwash or Recovery too early, before trying the cheaper fixes that solve the same problem without erasing anything. If a device feels sluggish, checking why it’s slow or why it keeps freezing usually finds the real culprit (a memory-hogging tab, too many extensions, or a background process eating the CPU) long before a wipe becomes necessary. A Powerwash won’t fix a hardware problem, and it’s overkill for something a restart would have solved in thirty seconds.
Recovery is rarer still, and that’s intentional. You’ll know you genuinely need it because nothing else works: the device won’t boot, gets stuck at a black screen, or shows the “ChromeOS is missing or damaged” message without you doing anything. If you’re still in the troubleshooting phase rather than staring at that exact screen, work through the steps in our Chromebook keeps crashing guide first. There’s a good chance you won’t need recovery media at all.
What Should You Do After Recovery Finishes?
After Recovery finishes, sign back into your Google Account, let ChromeOS pull your synced settings back down, and check for updates before you start reinstalling anything else.
Recovery leaves you with a completely clean install of ChromeOS, so you’re looking at the same setup screen you saw the day you first unboxed the device. Sign in with your Google Account, and Chrome will restore your bookmarks, extensions, and other synced settings automatically, provided sync was turned on before the reset. Open tabs from before the reset won’t come back through this process, though — sync restores settings and bookmarks, not the specific windows and tabs you happened to have open, which is the exact gap BelayTab’s Recovery screen and Sync are built to cover.
Once you’re signed back in, head to Settings > About ChromeOS > Check for updates. A freshly recovered device is often running an older ChromeOS build than the one it shipped with originally, since the recovery image isn’t necessarily the latest version available. Chromebooks get automatic updates for up to ten years from the platform’s original release, so this is also a reasonable moment to check where your specific device sits on that timeline — see our guide to Chromebook updates for what an approaching cutoff date means for you.
Last, work back through anything you backed up earlier. Reinstall BelayTab from the Chrome Web Store, and if you moved your export file to Drive beforehand, pull it back down and import it to restore your saved sessions. If you had Sync turned on instead, just sign back into BelayTab and your sessions reappear on their own, with nothing to copy and nothing left to remember for next time.